Beach Photography Tips: Capture Stunning Coastal Landscapes

Beach photography tips: Capturing stunning coastal landscapes necessitates mastering specific camera settings, understanding natural light, and employing composition techniques to transform ordinary beach scenes into breathtaking photographic art.
Embarking on the journey of beach photography tips: capture stunning coastal landscapes with these expert settings opens up a world of creative possibilities. The dynamic interplay of light, water, and sand offers a unique canvas for photographers, yet it presents distinct challenges. This guide is crafted to equip you with the knowledge and techniques needed to elevate your beach photography from simple snapshots to captivating masterpieces.
Mastering the Fundamentals of Beach Photography Before You Shoot
Before even thinking about camera settings, a solid understanding of beach photography fundamentals is crucial. The beach environment is unique, constantly changing, and demands a specific approach.
Unlike other landscapes, the beach brings together elements of water, sky, and land in unpredictable ways. This variability means your preparation needs to be as adaptable as the environment itself. From anticipating tidal movements to understanding the unique challenges presented by sand and salt, every detail matters.
Understanding Light and Timing
Light is the painter’s brush in photography, and on the beach, it behaves distinctively. The vast, open skies mean light can be harsh at midday or incredibly soft during the golden and blue hours. Timing your shoot to coincide with these optimal lighting conditions dramatically enhances your results.
- 🌅 Golden Hour: Occurs shortly after sunrise and before sunset. This light is warm, soft, and creates long, flattering shadows, perfect for adding depth and drama.
- 🔵 Blue Hour: The period of twilight each morning and evening where the sky is not yet fully dark nor fully lit. It produces a cool, serene blue tone, ideal for moody and atmospheric shots.
- ☁️ Overcast Days: Don’t dismiss them! Overcast skies act as a giant softbox, diffusing light evenly and reducing harsh shadows, which is excellent for detailed close-ups or when you want to minimize glare on the water.
The time of day also influences the crowds. Early mornings are typically quieter, offering pristine, undisturbed sands and a sense of solitude that can significantly improve your compositions.
Gear Protection and Preparation
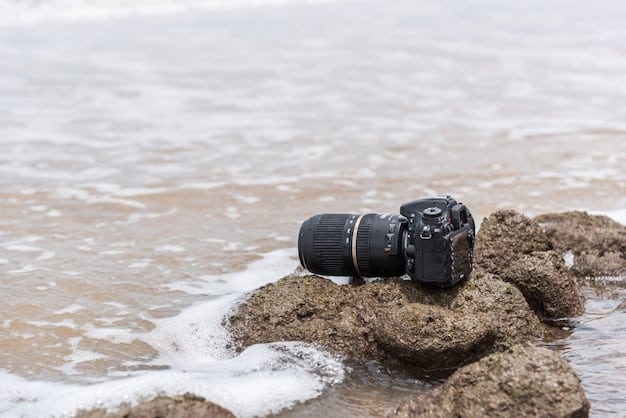
The beach environment, while beautiful, is notoriously harsh on camera gear. Sand, salt spray, and humidity are constant threats. Taking precautions is not optional; it’s essential for the longevity of your equipment.
- 💧 Weather Sealing: If your camera and lenses are weather-sealed, it’s a huge advantage. If not, consider protective covers or rain sleeves.
- 💨 Blower and Microfiber Cloths: Always have these on hand to remove sand and water spots without scratching lenses. Never wipe sand with a cloth—use a blower first.
- 🎒 Waterproof Bag: A good camera bag that offers protection against water and sand is indispensable. Keep zippers closed whenever possible.
Beyond protection, think about what gear you’ll actually need. Overpacking can be cumbersome on the sand. A tripod is almost always recommended for stability and long exposures, but assess its necessity for each shot. A spare battery is also a wise inclusion, as colder or windier conditions can drain power faster.
Understanding these foundational aspects—light, timing, and gear protection—lays the groundwork for successful beach photography. They prevent common pitfalls and allow you to focus on the creative aspects once you’re on location. The beach is a dynamic setting, and being prepared means you can adapt to its ever-changing moods, ensuring your equipment is safe while you focus on capturing truly stunning images.
Essential Camera Settings for Dynamic Beach Shots
Optimizing your camera settings for beach photography is critical to capturing the unique qualities of coastal landscapes. The interplay of bright sun, reflective water, and vast skies requires careful consideration of exposure, focus, and white balance to achieve professional results.
ISO, Aperture, and Shutter Speed: The Exposure Triangle
The exposure triangle is your fundamental toolset. On the beach, each component needs careful calibration.
- ISO: Keep your ISO as low as possible, typically 100 or 200, to minimize noise and maximize detail. The ample natural light on a beach usually allows for this.
- Aperture (f-stop): For sweeping landscapes, a narrow aperture like f/11 to f/16 is ideal to ensure a deep depth of field, keeping everything from the foreground to the distant horizon sharp. For close-ups of seashells or textures, a wider aperture (e.g., f/4 to f/8) can create beautiful bokeh.
- Shutter Speed: This is where creativity truly shines. For frozen action (like crashing waves), a fast shutter speed (1/500s or faster) is necessary. For silky smooth water or long exposure effects, a slow shutter speed (1 second or more) is required, often with the aid of an ND filter.
The key is to balance these three. Start with your desired depth of field (aperture), then adjust shutter speed for motion, and finally, tweak ISO minimally if more light is needed.
White Balance for True-to-Life Colors
The beach environment presents unique challenges for white balance due to the strong presence of blue from the sky and reflections from the sand. An incorrect white balance can lead to images that look too cool or too warm.
While auto white balance (AWB) is a good starting point, manual adjustments often yield superior results. Experiment with settings like “Cloudy” for warmer tones on an overcast day, or “Shade” to add warmth during direct sunlight. Shooting in RAW format allows for flexible white balance adjustments in post-processing without loss of quality, offering a safety net if your in-camera setting isn’t perfect.
Focusing Techniques for Sharpness
Achieving sharp focus is paramount, especially when dealing with elements at varying distances. Single-point autofocus is often the most precise option, allowing you to select a specific point of interest, such as a rock formation or the distant horizon.
- 🎯 Hyperfocal Distance: For maximum depth of field, consider focusing at the hyperfocal distance. This technique helps ensure everything from a certain point to infinity is in sharp focus, ideal for expansive landscapes.
- 🌊 Manual Focus: In challenging conditions, like low light or when attempting long exposures, manual focus can provide greater control and accuracy. Use live view and zoom in to ensure precise focus.
Don’t forget to consider movement within your frame. If waves are central to your composition, time your shot to capture them at their most dramatic, ensuring your focus is locked on the desired part of the wave before it recedes.
Mastering these foundational camera settings—exposure, white balance, and focus—provides the technical backbone for your beach photography. Understanding how each impacts the final image allows for deliberate creative choices rather than relying on chance. With these in mind, you’re well-equipped to capture the transient beauty of coastal landscapes with stunning clarity and impact.
Compositional Techniques for Captivating Beach Landscapes
Beyond camera settings, strong composition is what truly transforms a photograph from a mere record to a piece of art. On the beach, the vastness of the environment offers both opportunities and challenges for creating compelling compositions that draw the viewer’s eye into the scene.
A well-composed image leverages natural elements and established photographic rules to create balance, depth, and visual interest. It guides the viewer through the scene, highlighting what you, as the photographer, intend to emphasize.
Rule of Thirds and Leading Lines
These classic compositional guidelines are incredibly effective in beach photography:
- 📏 Rule of Thirds: Imagine your frame divided into nine equal sections by two horizontal and two vertical lines. Placing key elements along these lines or at their intersections creates more balanced and dynamic compositions than simply centering your subject. For example, position the horizon on one of the horizontal lines, or a notable rock on an intersection point.
- 〰️ Leading Lines: Utilize natural lines in the landscape to draw the viewer’s eye into the shot. The receding tide leaving trails on the sand, the patterns of waves, or even a line of seashells can act as leading lines, guiding the eye toward your main subject or deeper into the scene.
Applying these isn’t about rigid adherence, but rather using them as a framework to start building your composition. Sometimes, breaking the rules intentionally can lead to powerful and unique images, but it’s essential to understand them first.
Foreground Interest and Depth
Beach landscapes can sometimes appear flat due to the expansive open spaces. Introducing foreground interest is a powerful way to add depth and scale to your images.
Consider placing elements like interesting rocks, driftwood, shells, or even ripples in the sand prominently in your foreground. These details provide an anchor for the viewer’s eye and create a sense of three-dimensionality, drawing them into the vastness beyond.
This technique prevents the image from feeling empty, giving the viewer something immediate to connect with. It acts as a visual entry point into the wider landscape.
Reflections and Silhouettes
The beach offers abundant opportunities for capturing stunning reflections and dramatic silhouettes. These elements add mood, mystery, and visual appeal:
- ✨ Reflections: Wet sand at low tide or calm pools of water can act as perfect mirrors, doubling the beauty of the sky, clouds, or coastal features. Position yourself to capture these symmetrical or abstract reflections, especially during sunrise or sunset when colors are most vibrant.
- 👤 Silhouettes: Shooting directly into the light source, particularly during the golden hour, allows you to create dramatic silhouettes. Frame elements like people, trees, or structural features against a bright sky, reducing them to dark, compelling shapes that emphasize form and outline.
Both reflections and silhouettes require careful consideration of light and angle. For reflections, aim for still water and position yourself lower to the ground. For silhouettes, ensure your background is significantly brighter than your subject to create the desired contrast.
By blending the technical precision of camera settings with these creative compositional techniques, you elevate your beach photography. You move beyond merely documenting a scene to crafting an image that evokes emotion, tells a story, and truly captivates anyone who views it.
Creative Techniques for Unique Beach Photos
Moving beyond the basics of exposure and composition, exploring creative techniques can distinguish your beach photography. These approaches allow you to experiment with light, time, and perspective to capture truly unique and memorable images.
The consistent elements of sand, sea, and sky can, paradoxically, lead to repetitive imagery. Introducing creative techniques helps you see the familiar in a new light, transforming ordinary scenes into extraordinary visual narratives.
Long Exposure Photography at the Coast
Long exposure is arguably one of the most popular and impactful techniques for beach photography. By keeping your camera’s shutter open for an extended period, you can transform moving water into a silky, ethereal mist while static elements remain sharp.
This technique smooths out rough waves, turns crashing surf into a soft blur, and often simplifies the scene, emphasizing minimalist beauty. It’s particularly effective during daylight when you need to use Neutral Density (ND) filters to block light and achieve longer shutter speeds.
- ND Filters: These are sunglasses for your lens, allowing you to use slower shutter speeds even in bright conditions. A 6-stop or 10-stop ND filter is a versatile starting point.
- Tripod: Absolutely essential. Any camera movement during a long exposure will result in blurry images.
- Remote Shutter Release: Minimizes camera shake from pressing the shutter button, ensuring crisp stationary elements.
Experiment with different shutter speeds to achieve varying degrees of blur. A few seconds might create a slight blur, while minutes can make water completely disappear into a glassy surface.
Capturing Sunrises and Sunsets: The Magic Hours
Sunrises and sunsets offer the most dramatic and colorful light on the beach. These “magic hours” are fleeting but provide incredible opportunities for captivating images.
The key is anticipation and preparation. Arrive early to scout your location and set up your gear, giving yourself ample time to adjust to the changing light. Plan your composition around interesting foreground elements like tide pools, rock formations, or silhouettes.
When shooting into the sun, meter for the brightest part of the sky to prevent blown-out highlights, or use bracketing (taking multiple exposures at different settings) to capture the full dynamic range. Post-processing can then blend these exposures for a perfectly balanced image.
Playing with Perspectives and Details
Don’t just shoot from eye level. Experimenting with different perspectives can yield surprisingly fresh results.
- ⬆️ High Angle: Find a higher vantage point to capture the expansive sweep of the coastline, showing patterns in the sand or the curve of the shoreline.
- ⬇️ Low Angle: Get down to water level to emphasize foreground elements like seashells or small ripples, making them appear grander and drawing the viewer into the texture of the sand.
- 🔎 Macro Photography: Look for the small details that often go unnoticed—the intricate patterns on a seashell, the texture of a piece of driftwood, or the delicate foam bubbles left by a receding wave. A macro lens or extension tubes can reveal a hidden world of beauty.
Zooming in on specific elements, rather than always capturing the wide vista, can create a sense of intimacy and discovery. These detailed shots can complement your broader landscape images, telling a more comprehensive story of the beach experience.
Incorporating these creative techniques allows you to push the boundaries of conventional beach photography. They encourage you to think differently about how you portray the environment, resulting in a portfolio of images that are not just beautiful, but also unique and deeply personal.
Post-Processing Techniques for Enhancing Beach Photos
Once you’ve returned from the beach with your shots, the work isn’t over. Post-processing is a crucial step that can transform good photos into great ones. It allows you to fine-tune your images, correct imperfections, and enhance the mood and impact you envisioned.
Think of post-processing not as fixing a bad shot, but as refining an artistic vision. It’s where you truly make the image your own, bringing out the vibrant colors, dramatic contrasts, and subtle details that might have been lost in the initial capture.
Essential Adjustments in Lightroom/Photoshop
Most beach photos benefit from a few core adjustments:
- Exposure and Contrast: Even well-exposed photos can often benefit from slight adjustments. Boost contrast to make colors pop and define shapes. Be careful not to overdo it, leading to clipped shadows or highlights.
- Highlights and Shadows: Beaches can have extreme light variations. Lowering highlights can recover detail in bright skies, while lifting shadows can reveal hidden textures in shaded areas or the foreground.
- White Balance Correction: If you shot in RAW, this is where you can perfect your white balance, ensuring accurate colors that reflect the true atmosphere of the scene.
- Clarity and Dehaze: The “Dehaze” slider is a godsend for beach photos, cutting through atmospheric haze and improving clarity, especially in distant elements. “Clarity” adds mid-tone contrast, making images appear sharper.
These initial adjustments set the foundation. Work non-destructively, creating virtual copies or using adjustment layers, so you can always revert to your original image.
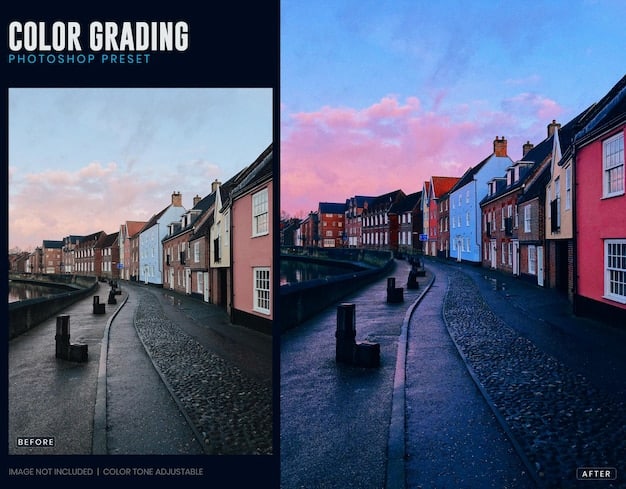
Color Grading and Saturation
Color is a dominant element in beach photography. Thoughtful color grading can significantly impact the mood and visual appeal of your image.
Avoid simply boosting saturation across the board, which can lead to unrealistic, garish colors. Instead, use targeted adjustments:
- 🎨 HSL Panel: This allows you to adjust the Hue, Saturation, and Luminance of individual colors. For instance, you could increase the saturation of blues in the sky and water without affecting the warmth of the sand.
- 🌅 Split Toning/Color Grading: Add specific color casts to highlights and shadows. For example, adding subtle oranges or yellows to highlights can enhance a sunset, while adding blues to shadows can create a serene, cool feel.
The goal is to enhance, not distort, the natural beauty. Aim for vibrant but believable colors that convey the feeling of being there.
Sharpening and Noise Reduction
The final touches involve sharpening and noise reduction. These steps should be applied carefully and usually as the last part of your workflow.
- Sharpening: Apply sharpening judiciously to enhance edge definition. Zoom in to 100% to avoid over-sharpening, which can introduce artifacts. Often, selective sharpening (e.g., only on key subjects like rocks or distant waves) is more effective than global sharpening.
- Noise Reduction: If you had to use a higher ISO, some noise (graininess) might be present. Apply noise reduction carefully, as aggressive application can smooth out fine details and make images look plasticky. Start with luminance noise reduction and add color noise reduction if needed.
Remember, post-processing is an iterative process. Take breaks, view your images on different screens, and get feedback. The aim is to make your best shots even better, bringing out their full potential and leaving a lasting impression on viewers.
Advanced Considerations for the Discerning Beach Photographer
For those looking to push the boundaries of their beach photography, certain advanced considerations can further refine your craft. These delve into more nuanced aspects of light, equipment, and environmental awareness, setting your work apart.
Moving beyond technical proficiency, advanced considerations involve developing a deeper understanding of the beach as a subject and how your photographic choices can convey its dynamic nature more effectively. It’s about being proactive, not just reactive, to the environment.
Understanding Tides and Their Impact
The tide is a powerful, often overlooked, element in beach photography. Its ebb and flow dramatically change the landscape, revealing new compositions and textures.
- Low Tide: Reveals vast expanses of wet sand perfect for reflections, exposes fascinating rock structures, and creates intricate patterns in the sand as water recedes. It’s ideal for wide-angle shots and exploring details.
- High Tide: Limits accessible beach area but can bring the water closer to interesting foreground elements like cliffs or pier pilings, allowing for more intimate water-centric compositions.
Consulting tide charts before your shoot is crucial for planning. Knowing when high and low tides occur can help you anticipate the best opportunities for specific shots and ensure your safety near the waterline.
Utilizing Filters Beyond ND
While ND filters are essential for long exposures, other filters offer distinct advantages for beach photography:
- ⚫ Circular Polarizer (CPL): This is a must-have. A CPL filter reduces glare from the water and wet surfaces, enhances color saturation (especially blues in the sky and greens in foliage), and improves contrast. It’s incredibly effective at making water more transparent, revealing what’s beneath the surface.
- Graduated Neutral Density (GND) Filters: These filters are half-dark, half-clear, with a smooth transition in between. They are invaluable for balancing exposure between a bright sky and a darker foreground, preventing skies from being overexposed or foregrounds from being underexposed, especially during sunrises and sunsets.
Using filters requires an understanding of their effects and careful handling to keep them clean on the sandy beach.
Safety and Ethical Considerations
The beauty of the beach can sometimes make photographers forget important safety and ethical guidelines. Prioritizing these aspects ensures a responsible and sustainable approach to your art.
- 🧑🤝🧑 Crowds and Privacy: Be mindful of others enjoying the beach. If photographing people, obtain permission. Respect private property signs and give people their space.
- 🚨 Environmental Impact: Beach ecosystems are fragile. Avoid disturbing wildlife, stay on designated paths, and leave no trace behind. Pack out everything you pack in.
- 🌊 Water Safety: Never turn your back on the ocean. Waves can be unpredictable. Protect your gear from rogue waves and be aware of rip currents.
By considering these advanced points, you not only improve the technical and artistic quality of your beach photography but also ensure you’re a responsible and respectful artist. The beach is a shared natural wonder, and our actions as photographers should reflect that appreciation.
Building Your Beach Photography Portfolio
As you gather more stunning beach photographs, the next step is to curate and present your work effectively. Building a strong portfolio is about more than just having individual great shots; it’s about showcasing your skill, vision, and consistency as a photographer.
A well-structured portfolio tells a story and demonstrates your unique artistic voice. It allows potential clients, art buyers, or even just fellow enthusiasts to understand your photographic style and strengths.
Curation: Selecting Your Best Work
The first and most critical step in portfolio building is curation. This means being selective and objective when choosing which images to include. It’s not about including every “good” photo, but only your absolute best, most impactful ones.
- Quality Over Quantity: A portfolio of 10 exceptional images is far more impressive than one with 50 mediocre ones. Focus on images that are technically strong, creatively composed, and evoke emotion.
- Consistency in Style: While variety is good, aim for a cohesive style or theme across your beach photography. This shows intentionality and a developed artistic voice.
- Storytelling: Do your images collectively tell a story about the beach? Can they stand alone, but also work together as a series?
Get feedback from trusted peers or mentors. An outside perspective can often spot weaknesses or highlight strengths you might overlook in your own work.
Showcasing Your Images Online
In today’s digital age, an online presence is essential for photographers. Several platforms cater to portfolios:
- 💻 Personal Website/Portfolio Site: This offers the most control over your branding and presentation. Platforms like Squarespace, Pixpa, or Adobe Portfolio make it easy to create professional-looking sites without coding.
- 📸 Social Media: Instagram, Flickr, and 500px are popular for sharing photographic work. While great for exposure, remember these platforms are often less about curated portfolios and more about a continuous stream of content.
- 🌐 Print-on-Demand/Art Sites: Sites like Etsy or Fine Art America can serve dual purposes: showcasing your work and providing a platform for sales.
Ensure your images are optimized for web viewing (appropriate resolution and file size) to load quickly without sacrificing quality. Craft compelling captions and use relevant keywords to improve discoverability.
Continuous Learning and Evolution
Photography is a journey of continuous learning. The beach environment, with its ever-changing light and conditions, offers endless opportunities for growth.
Stay updated on new techniques, editing software, and gear. Join photography communities, attend workshops, or simply dedicate time to experimenting with new approaches. Review your own work critically, identifying areas for improvement and new creative avenues to explore.
Your portfolio should be a living document, evolving as your skills and artistic vision mature. Regularly review and update it, ensuring it always represents your current best work and where you aspire to go next as a beach photographer.
By thoughtfully curating, effectively showcasing, and continuously learning, you can build a compelling beach photography portfolio that not only highlights your talent but also serves as a testament to your passion for capturing the profound beauty of coastal landscapes. This ongoing process transforms individual photos into a cohesive body of work, ready to be shared with the world.
| Key Point | Brief Description |
|---|---|
| 🌅 Optimal Timing | Shoot during golden or blue hours for best light; consider overcast days for soft, even illumination. |
| ⚙️ Camera Settings | Use low ISO, narrow aperture (f/11-f/16), and adjust shutter speed for desired motion or long exposure. |
| 🖼️ Composition | Apply Rule of Thirds, leading lines, foreground interest, reflections, and silhouettes for dynamic shots. |
| 🛠️ Post-Processing | Refine exposure, colors (HSL), and sharpness; use Dehaze for clarity without over-saturating. |
Frequently Asked Questions
▼
Essential gear includes your camera, a sturdy tripod (for stability and long exposures), a wide-angle lens, and protective measures like a waterproof bag and microfiber cloths to combat sand and salt spray. Neutral Density (ND) and Circular Polarizer (CPL) filters are highly recommended for advanced control over light and reflections.
▼
Sand and salt can easily scratch lenses, clog internal mechanisms, and corrode electronics. To protect your gear, use a weather-sealed camera if possible, always keep lens caps on when not in use, use a waterproof camera bag, and avoid changing lenses in windy conditions. Use a blower (never wipe) to remove sand particles.
▼
For freezing wave action, use a fast shutter speed (e.g., 1/500s or faster). For a silky smooth, ethereal effect, use a slow shutter speed (1-30 seconds or more) combined with an ND filter and a tripod. Always keep ISO low (100-200) for minimal noise and use an aperture between f/8-f/16 for good depth of field.
▼
Both sunrise and sunset offer unique advantages. Sunrise (golden hour and blue hour) often provides softer, clearer light and fewer crowds, resulting in pristine views. Sunset provides dramatic colors and is more accessible for many photographers. The “best” time depends on your desired mood and composition, but both are ideal for vibrant skies and reflections.
▼
To make your photos stand out, focus on unique compositions (e.g., strong foreground interest, reflections). Experiment with creative techniques like long exposures for milky water. Pay attention to unique lighting conditions and use post-processing to enhance, not just correct, your images. Developing a consistent artistic vision also helps your work be recognizable.
Conclusion
Capturing truly stunning coastal landscapes through beach photography is a rewarding endeavor that blends technical skill with artistic vision. By mastering essential camera settings, understanding the nuances of light, employing creative compositional techniques, and refining your images through post-processing, you can transform ordinary beach scenes into extraordinary works of art. Remember to prioritize gear protection and consider safety and ethical guidelines, ensuring your passion for photography respects the delicate balance of the natural environment. Each trip to the beach offers a new opportunity to tell a unique story through your lens, continually refining your craft and building a portfolio that reflects the timeless beauty of the coast.


